SHORT ANSWER
- To Change DNS on Firestick:
- Step 1: Select Settings → My Fire TV → About → Network → Note down the information.
- Step 2: Move back to Settings → Network → Choose your WiFi Network → Click the Hamburger icon → Forget the network.
- Step 3: Select your home WiFi → Advanced → Enter the noted WiFi Password, IP Address, Gateway, and Subnet Mask → Type DNS 1 and DNS 2 → Restart → Done.
The following guide will clearly explain to you the steps to change DNS on your Firestick and Fire TV devices.
Steps to Change the DNS on Firestick
Changing the DNS settings on your Firestick can help you improve your streaming experience, improve your internet speed, and more. This can be achieved by navigating to your Fire TV Settings. So, fetch your Fire TV remote and check whether the remote is in pairing mode. If so, you can follow the below steps chronologically.
Get Ultimate Streaming Freedom on Firestick !!
Are you concerned about your security and privacy while streaming on a Firestick? Getting a NordVPN membership will be a smart choice. With high-speed servers spread globally, NordVPN shields your online activities on Firestick from ISPs and hackers. It also lets you unblock and access geo-restricted content. NordVPN helps you avoid ISP throttling and ensures you a smoother streaming experience. Subscribe to NordVPN at a discount of 70% off + 3 extra months to seamlessly stream live TV to on-demand and anything in between on your Firestick.

- Setup Firestick
After booting up, launch the home page and connect the Firestick to a strong WiFi network.
- Head to Settings
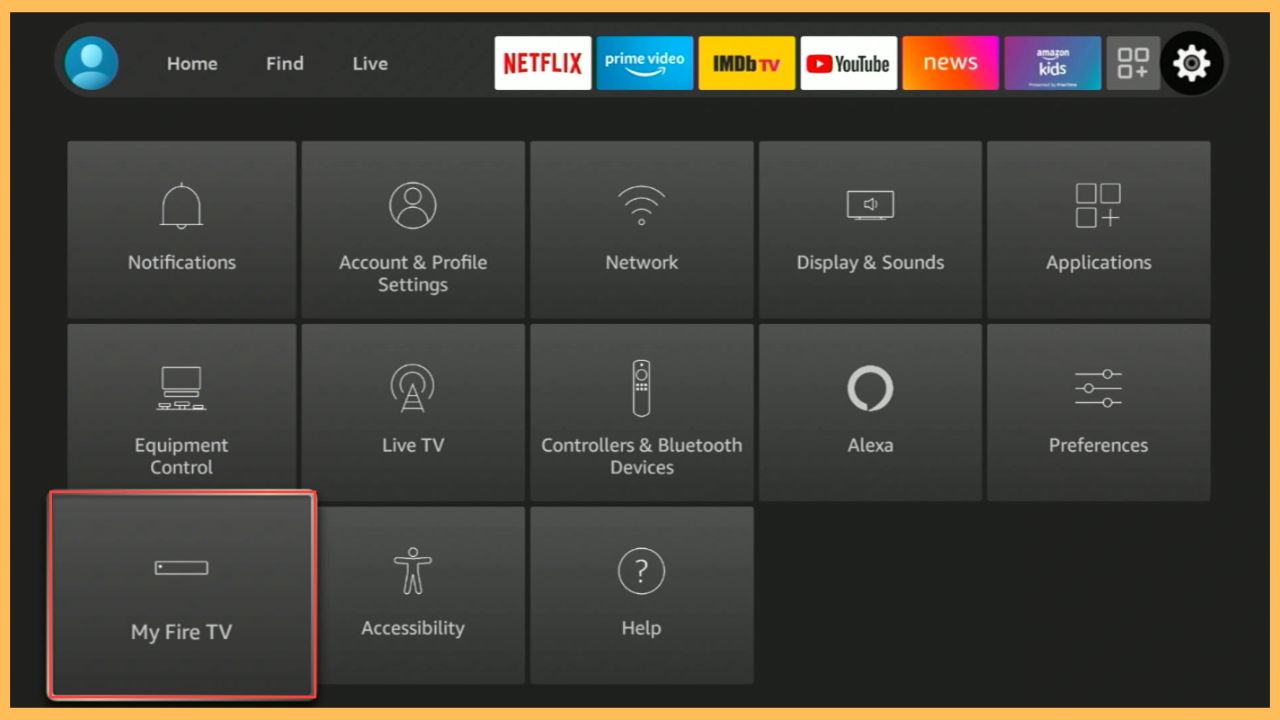
Use the navigation buttons on the remote control and hover over to choose the Settings icon on the Firestick home page.

- Choose My Fire TV
Highlight the My Fire TV tab and press the Select button to confirm the selection.

- Select Network
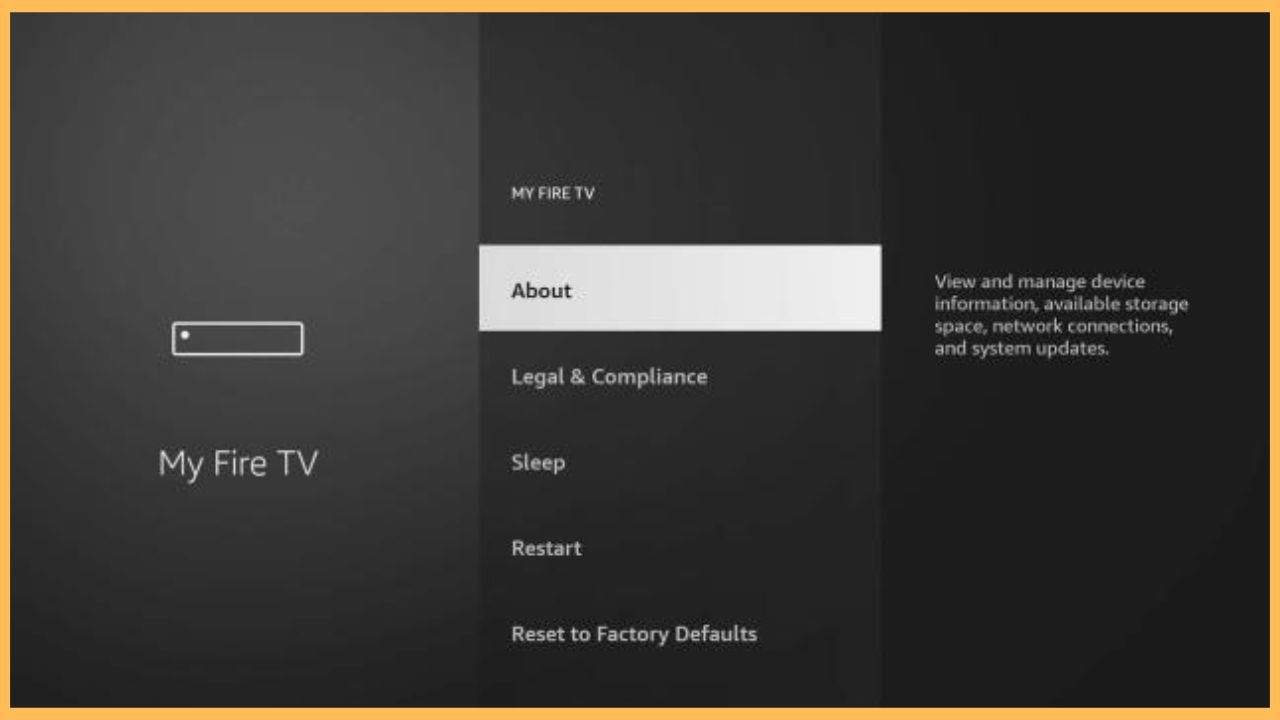
On the next screen, tap on the About option and select the Network option using the remote.

- Note Down DNS
Now, you can see a set of information like SSID, MAC Address, Subnet Mask, DNS, and IP Address of Firestick at the right pane. Note the information displayed on the Network page.
- Launch the Settings Section
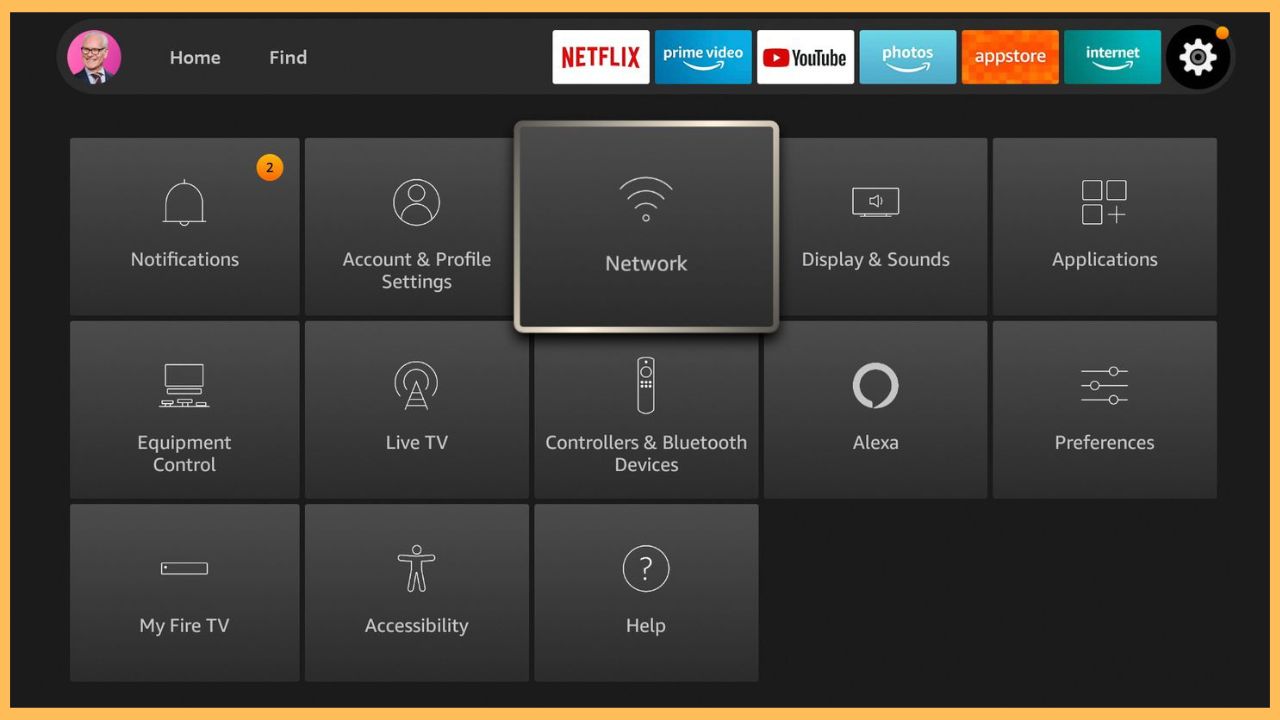
Then, head back to your Fire TV Settings and choose Network from the list of displayed tabs.

- Forget your WiFi Network
Highlight your home WiFi from the list of networks and press the Hamburger icon on the remote to forget the WiFi network on Firestick.
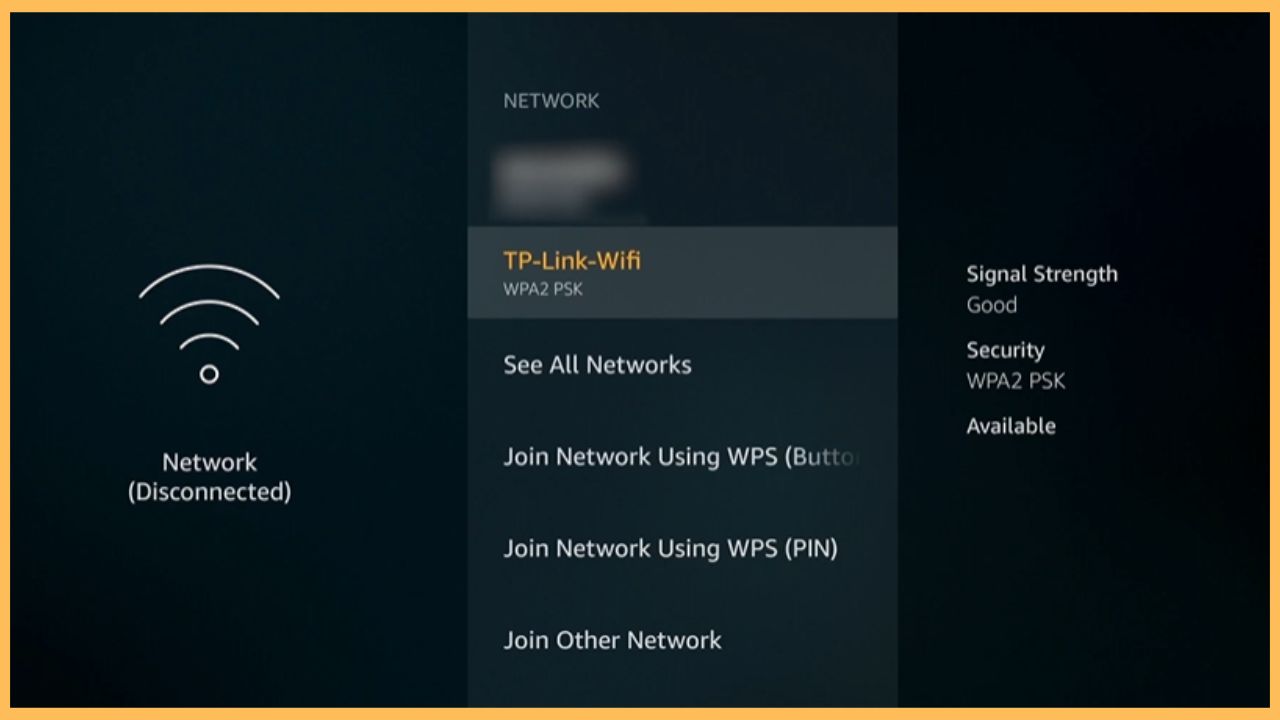
- Choose the WiFi Network
Once done, you will get the disconnected option. Now, scroll down and choose your home WiFi from the list of networks.

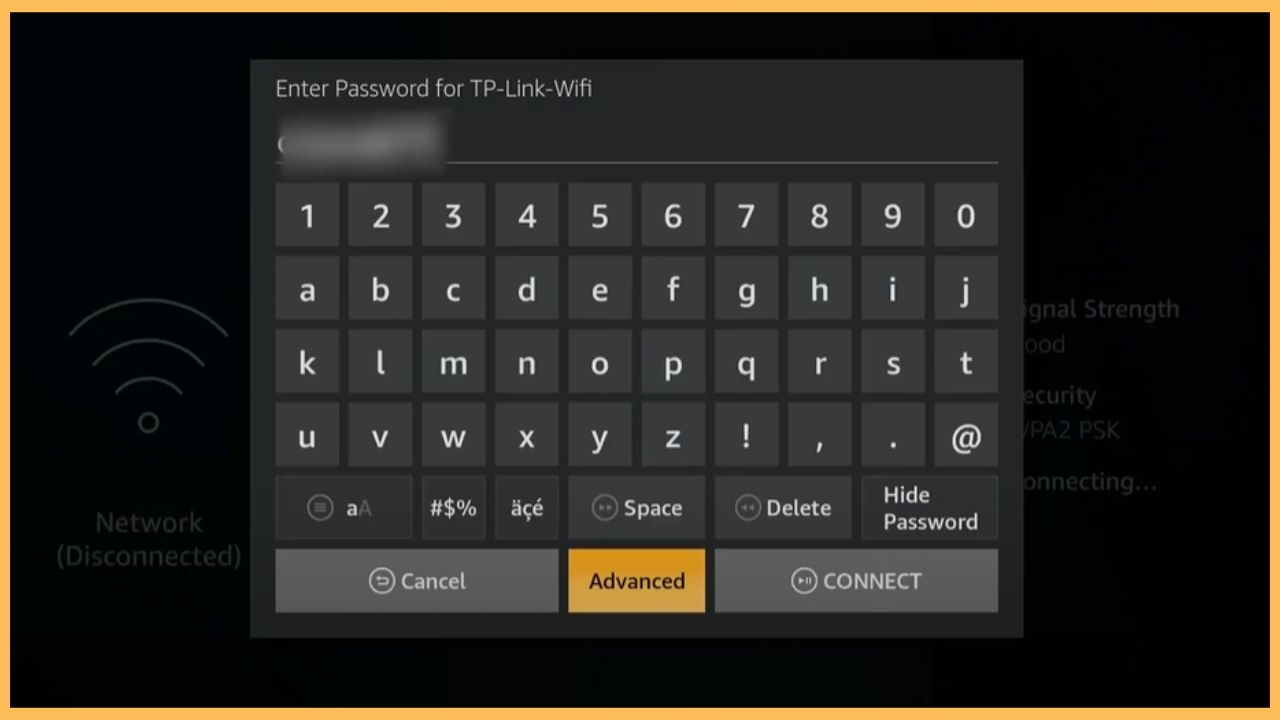
- Input the WiFi Password
Type your WiFi password using the on-screen keyboard and click the Advanced option at the bottom.

- Enter the Necessary Credentials
Then, enter the IP Address, Gateway, and Subnet Mask on the prompted field and click the Next button.

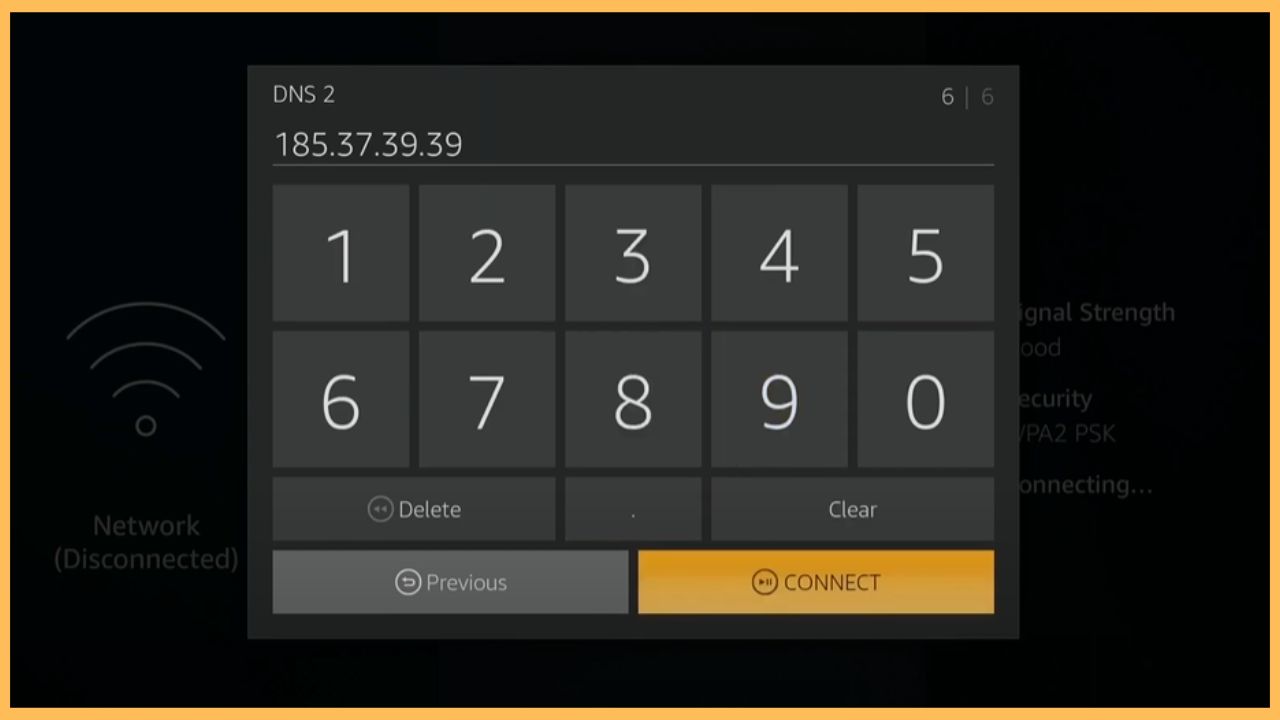
- Type the DNS Settings
Finally, you need to enter the respective DNS 1 and DNS 2 settings on the required space and tap on Connect to complete the process.

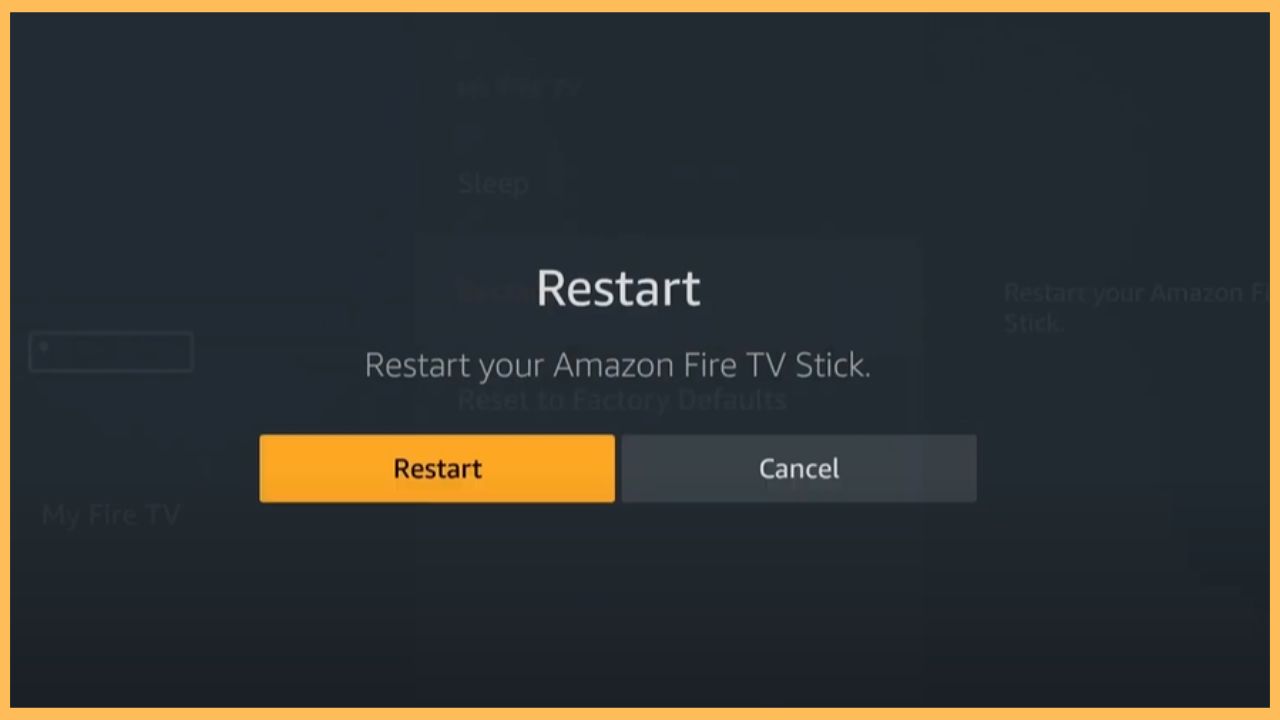
- Restart Firestick
Once done, head back to the settings section and choose the Restart option to restart your Amazon Fire TV Stick.

FAQ
Yes. You can change the DNS Settings on Firestick without WiFi by using a wired connection.
Some of the best DNS servers for Firestick are Google Public DNS, Cloudflare, and Quad9.
