
SHORT ANSWER
To Connect Firestick to WiFi: Click Settings → Network → Choose WiFi → Enter the Password → Click Connect
This article will help you learn the complete steps to connect your Fire TV or Firestick to a WiFi network.
Get Ultimate Streaming Freedom on Firestick !!
Are you concerned about your security and privacy while streaming on a Firestick? Getting a NordVPN membership will be a smart choice. With high-speed servers spread globally, NordVPN shields your online activities on Firestick from ISPs and hackers. It also lets you unblock and access geo-restricted content. NordVPN helps you avoid ISP throttling and ensures you a smoother streaming experience. Subscribe to NordVPN at a discount of 70% off + 3 extra months to seamlessly stream live TV to on-demand and anything in between on your Firestick.

Steps to Connect Firestick to WiFi
Connecting your Fire TV to a wireless internet connection is mandatory for streaming movies and TV shows. Even updating the firmware of the Fire TV to the latest version requires stable internet. Follow the below steps for a detailed guide.
- Navigate to Settings
After turning on your Firestick, you’ll be navigated to the home menu. From there, select Settings, which is a gear-shaped icon present in the right corner.

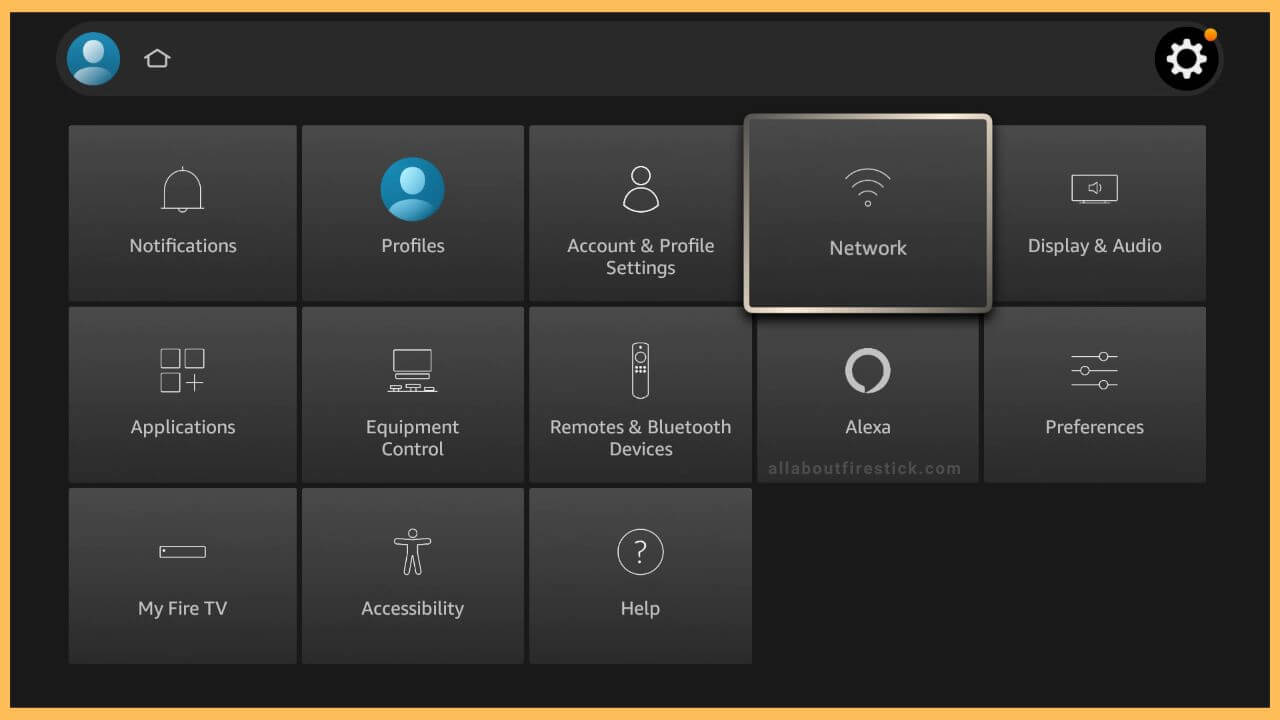
- Choose Network
Under the Settings menu, tap on the Network tile placed on the right side. The Network icon is symbolized by the WiFi image.
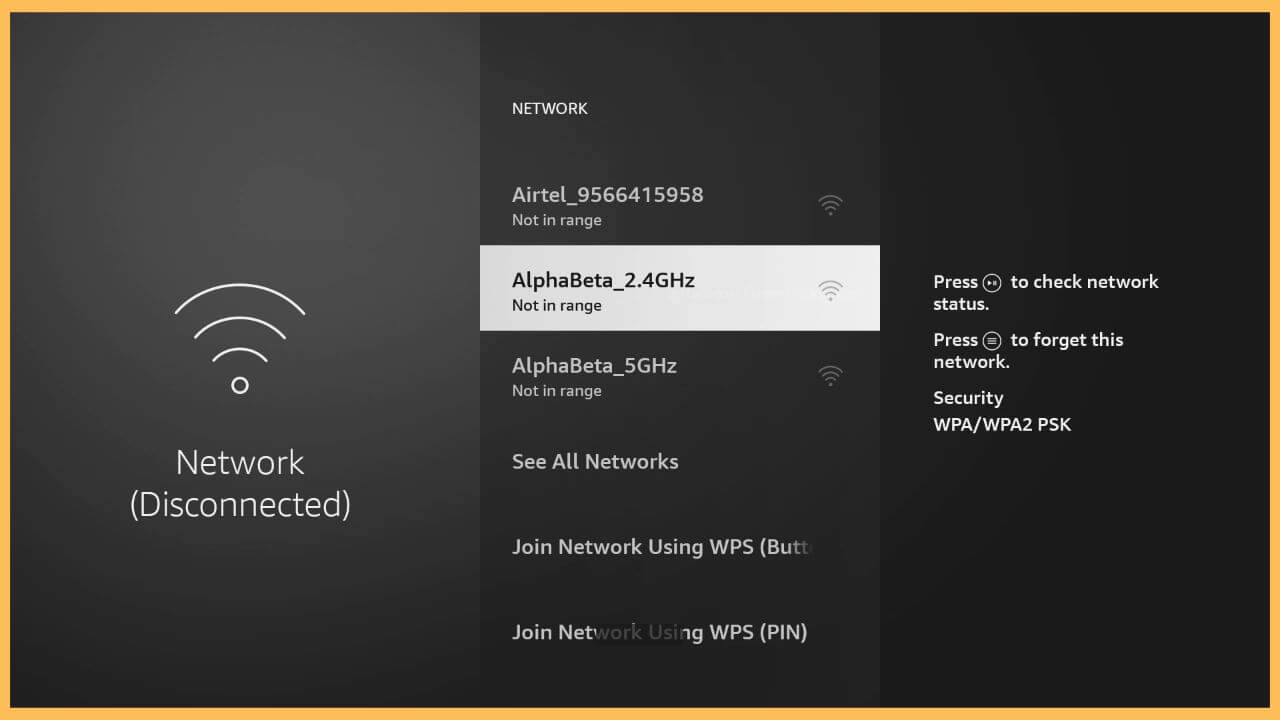
- Select WiFi
Now, it shows the available networks in the list view. Move through and choose your preferred network from the list. By selecting that, it undergoes an authentication process and asks for the password to connect with your TV. Enter the password in the given field.
- Click Connect
After this, press the Connect option shown on the pop-up screen. Your device will be connected to the WiFi network, and you are now ready to start streaming it error-free on your TV.


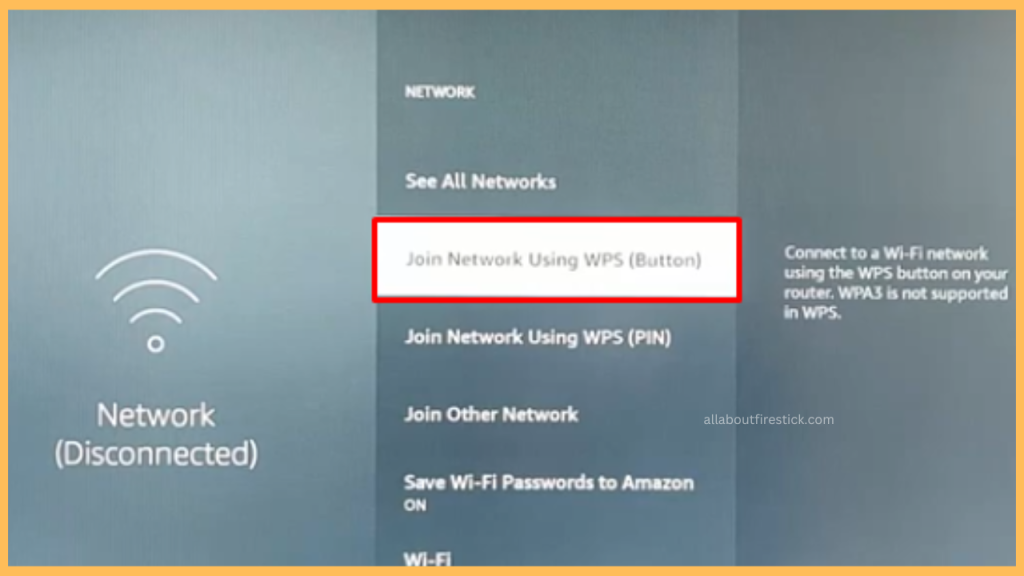
How to Connect Firestick to WiFi Without Password
If you have forgotten your WiFi password, you can’t connect your Fire TV to the secured network. In such cases, you can use the router’s WPS button to make a secure connection. To do that, navigate to the Network tab on your Firestick and select the Join Network Using WPS (Button) option. After that, fetch your WiFi router and hold the WPS button for 5 seconds straight. Within a few seconds, your WiFi router will automatically connect to your Firestick.
FAQ
Yes. After installing the Fire TV app from the Google Play Store or the App Store, you can pair it with your Fire TV and follow the above steps to connect your Fire TV to the WiFi network connection.
Yes. Using an Ethernet cable, you can easily connect your Fire TV to a wired internet connection.
This may be because of issues related to the WiFi router. In that case, you can restart your Fire TV Stick or your WiFi router to resolve the issue.